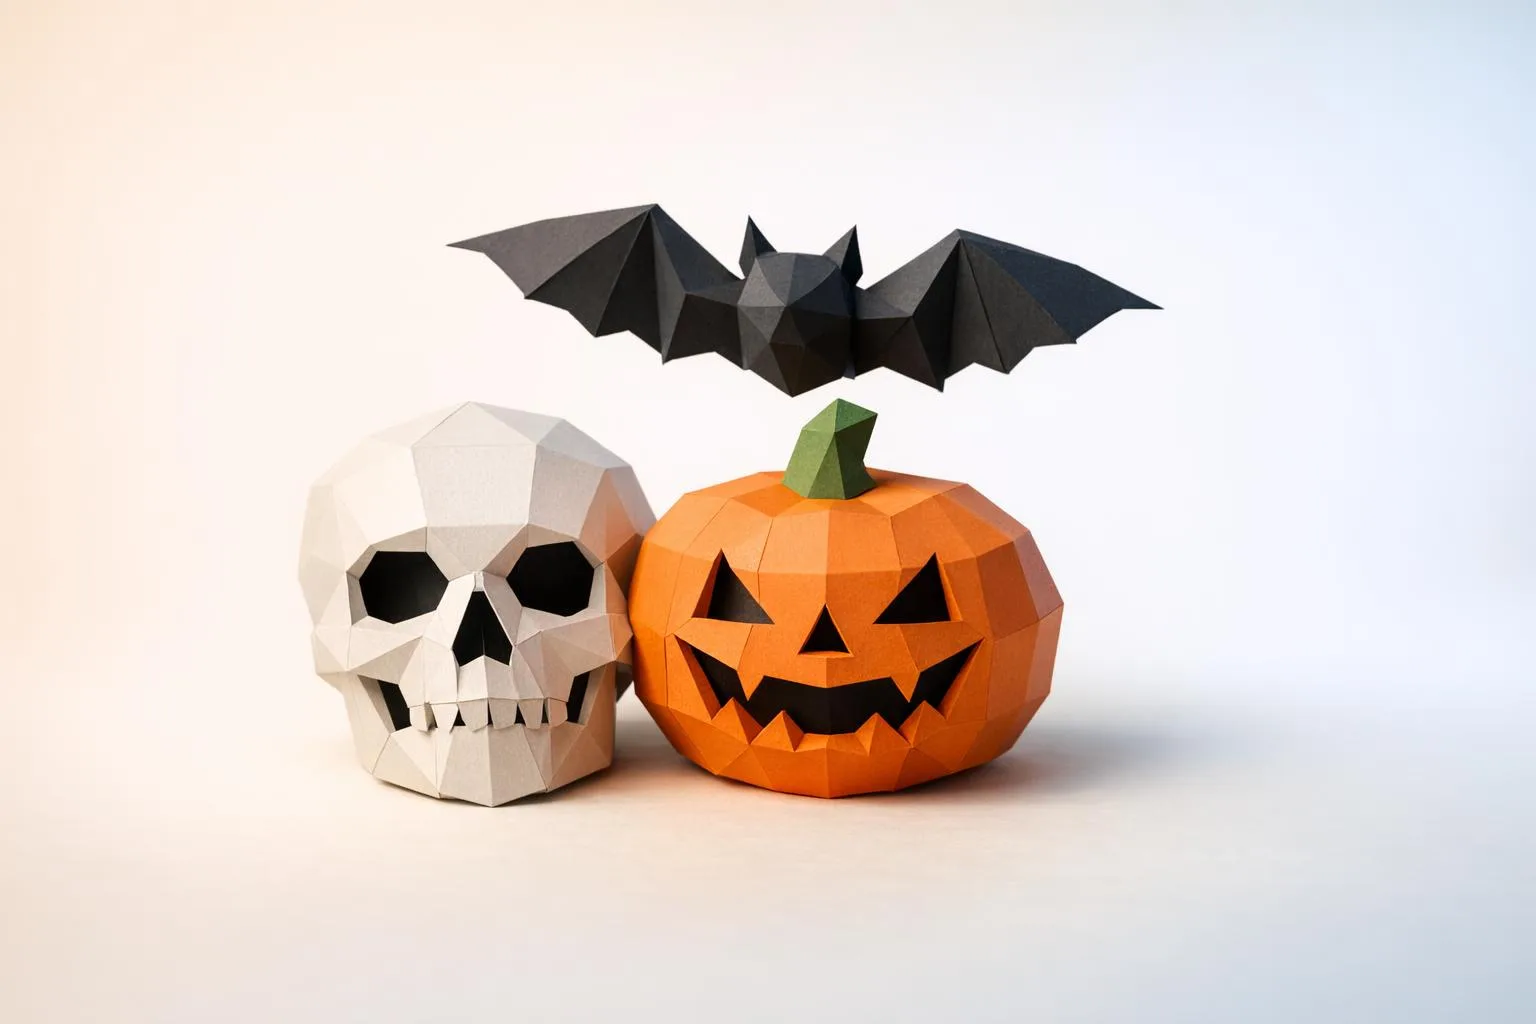
Want Halloween decor that stands out from the plastic garlands you see everywhere, or a costume that really turns heads without blowing your budget? Halloween papercraft ticks every box: bold visual impact, fun assembly, stunning 3D results, and almost endless customisation. With just a few sheets, a little patience, and the right templates, you can turn your living room, entryway, or outfit into a memorable party setting. In this guide, you’ll see why Halloween papercraft is a top trend in 2026, which models to choose based on your skill level and goal, how to assemble them without stress, and how to style them at home. You’ll also find a practical selection of models to build, smart buying tips, a quick 5-step tutorial, and a clear FAQ to help you avoid the classic mistakes.

Why Halloween papercraft is booming in 2026
Halloween is evolving. People are no longer just looking to “decorate fast” - they want a cohesive, photogenic, more personal atmosphere. That’s exactly where Halloween papercraft pulls ahead. Unlike standard mass-produced decor, 3D paper lets you build eye-catching statement pieces with modern geometric volumes, strong photo presence, and full freedom over colours, finishes, and styling.
In 2026, three major trends are driving papercraft forward. First, the return of useful DIY: people want to make things themselves, but still get a clean, decorative result they can reuse for more than one season. Second, the rise of “Instagram-worthy” home decor: a 3D Halloween pumpkin, a papercraft raven, or a 3D paper skeleton instantly creates a more polished look than a basic synthetic spiderweb. And third, the demand for lighter, easier-to-store, more affordable options than many bulky party decorations.
The big strength of papercraft is its dual purpose. You can use it to decorate a room, a table, an entryway, or a photo corner, but also to complete a costume with a mask or accessory. A dragon mask or a mouse skull mask gives you an instantly strong visual identity while staying lighter than many moulded masks. You assemble it, adjust it, reinforce it if needed, and end up with a one-of-a-kind piece.
Another big plus: the visual impact-to-price ratio. At between 6 € and 12 € for most Halloween models, you can build decor that makes a far stronger impression than throwaway store-bought items. It’s especially worth it if you want a complete theme: witchy, haunted manor, nocturnal animals, dark carnival, or a contemporary low poly vibe.
Halloween papercraft is also popular because it’s accessible. You don’t need to be an artist. With the right paper weight, a suitable glue, and a simple method, even a beginner can successfully build a first model. If you want to get the basics right, it’s also worth reading how to choose paper for papercraft and which adhesive to choose for papercraft. And if you love creature-inspired designs, the dinosaur papercraft guide shows really well how to create depth and character with paper shapes.
In short, Halloween papercraft is so popular today because it combines aesthetics, hands-on creativity, event decor, and the joy of making. You’re not just buying an object - you’re building the atmosphere.
The 11 best Halloween papercraft models to assemble
3D origami papercraft pumpkin for Halloween
Price: 6 € • Level: beginner
If you want a quick first success, this pumpkin is a perfect starting point. The shape is easy to read, the theme is instantly linked to Halloween, and the assembly stays manageable even if you’re a total beginner. It works beautifully as a table centrepiece, on an entry console, or grouped with other models to build a small seasonal display. Its size also makes it ideal for testing different finishes: matte orange paper, kraft effect, marker shading, or a nearby LED light to enhance the folds and depth.
3D Halloween pumpkin papercraft
Price: 10 € • Level: beginner to intermediate
This more detailed pumpkin is a great choice if you want a larger, more sculptural result. It works especially well for an entry display, an indoor window setup, or a Halloween buffet table. Where the smaller pumpkin keeps things simple, this one brings more visual presence. It pairs particularly well with a witch’s cauldron or a broom to build a more theatrical themed corner.
3D origami papercraft raven
Price: 10 € • Level: intermediate
The raven is one of the most effective motifs if you want to give your decor a gothic edge without slipping into kitsch. Its silhouette is instantly recognisable, and the low poly edges catch the light beautifully. Mounted on a dark wall, placed near LED candles, or added to a decorative arch, it creates a strong focal point. It’s a great pick if you’re aiming for a haunted manor, curiosity cabinet, or nocturnal forest atmosphere. In matte black, the result is often striking.
3D Halloween skeleton papercraft
Price: 10 € • Level: intermediate
For a more immersive setup, the skeleton is a classic that always works. In papercraft form, it becomes more graphically elegant: less “theme park”, more design-led and visually clean. It’s the right choice to animate a wall, a door, or a photo corner. It’s also a solid option if you’re hosting a party with older kids or teens, because it makes an impression without feeling overly realistic. Pair it with a black, ivory, and copper palette for a chic seasonal look.
3D origami papercraft witch’s cauldron
Price: 12 € • Level: intermediate
The cauldron is perfect if you want to build a real scene, not just place a single object. It becomes the centrepiece of a Halloween table, especially if you surround it with mini pumpkins, “potion” labels, faux grimoires, and soft lighting. In papercraft form, it stays light and easy to move around. It’s also excellent for photos, because its iconic shape instantly tells a story. If your theme is witchy, this is the key piece in the selection.
Halloween witch’s broom papercraft origami
Price: 12 € • Level: intermediate
Often overlooked, the broom is actually a brilliant decor accessory for adding movement to a composition. Hung up, leaned against a wall, or styled by the front door, it instantly enriches a witch-themed setup. It pairs beautifully with a witch hat and a Halloween wreath. Choose it if you want something less expected than the usual pumpkins, with a stronger storytelling feel.
3D origami papercraft witch hat for Halloween
Price: 12 € • Level: intermediate
This is the perfect bridge between decor and costume. The witch hat works equally well as a photo prop, a costume piece, or even a hanging room decoration if you’d rather style it in your space. Its big advantage: it says Halloween instantly, while feeling more elegant than a basic last-minute fabric accessory. If you want a quick but polished outfit, combine it with black clothing, light makeup, and another papercraft piece for a look that feels fully intentional.
3D origami papercraft dragon mask
Price: 8 € • Level: intermediate
If you want a real wow effect for a costume, the dragon mask is one of the best impact-for-price options in the catalogue. It instantly creates a strong silhouette, perfect for Halloween, costume parties, or photo shoots. The angular muzzle and faceted lines look spectacular in pictures, especially with side lighting. It’s also a smart pick if you want to move away from overdone themes. Add a dark outfit and a few metallic details, and you get a fast but convincing costume.
3D origami papercraft mouse skull mask for Halloween
Price: 8 € • Level: intermediate
This mask is a great choice if you want something stranger, more artistic, and less predictable than a basic animal mask. The skull motif creates an intriguing visual tension between cute and macabre, which works perfectly for Halloween. It grabs attention without needing an elaborate costume around it. Add a black cape, plain clothing, and subtle eye makeup, and you get a highly effective look. It also doubles as a great wall decor piece once the party is over.
Polygonal Halloween papercraft mask
Price: 8 € • Level: beginner to intermediate
This polygonal mask is an excellent entry point into costume papercraft. It has a modern, almost sculptural style that works just as well for a Halloween party as for a creative event or photo booth. Its biggest strength: it’s expressive enough to build a character, but simple enough to personalise. You can paint it, distress it, leave it raw, or play with black-and-white contrast for a more dramatic feel. A very solid pick if you want to try your first mask without overcomplicating things.
3D Halloween papercraft wreath
Price: 8 € • Level: beginner
The wreath is one of the easiest models to make look great right away. Hung on your front door, above a fireplace, or on a living room wall, it sets the mood before guests even step into the space. It’s also a practical option if you’re short on room. Assembly is usually less intimidating than a large mask or a bigger structure, while still delivering real visual satisfaction. For a balanced setup, pair it with a 3D pumpkin and a few dry branches.
Want even more models in the same style? Browse the full collection here: Halloween papercraft. You’ll find plenty of ideas to build a cohesive decor theme, mix costume accessories with wall pieces, or plan a whole party around a witchy, macabre, or fantasy-inspired universe.
How to choose your Halloween papercraft
Based on your goal: decor, costume, or both
Start with one simple question: do you want to decorate a space, complete a costume, or do both? For decor only, go for iconic shapes that read well from a distance, like the pumpkin, raven, skeleton, or cauldron. For a costume, choose a mask or hat - they have more impact on a silhouette. If you want a mixed use, the best options are often accessories you can later reuse as wall decor, like a dragon mask or a mouse skull mask.
Based on your patience and precision level
The real criterion isn’t just “beginner” or “intermediate” - it’s how much time you’re willing to give it. A simple model is perfect if you want a quick weekend win before Halloween. A wreath or small pumpkin gives you that instant satisfaction. On the other hand, a mask or more detailed piece will demand more care in folding and tab alignment. If you’re new to papercraft, avoid starting with the most ambitious model the night before your party.
Based on the space you have available
A successful decor setup depends heavily on scale. In a small hallway or flat, several small pieces placed thoughtfully are often more effective than one oversized object in the wrong spot. A wreath on the door, a pumpkin on a shelf, and a raven on the wall are often enough to set the mood. If you have a larger room, you can create a stronger focal point with a skeleton, cauldron, or themed table. Also think about storage after Halloween: paper is light, but a large-volume piece will always take up more space than a mask you can hang up.
Based on the visual style you want
Not all Halloween papercraft tells the same story. For a classic, family-friendly style, pumpkins and a wreath are safe picks. For a witchy atmosphere, go for the cauldron, broom, and hat. For something darker or more gothic, the raven and skeleton are especially effective. If you want something more fashion-led, more photo-friendly, and more contemporary, choose a low poly mask. The key is to keep your palette cohesive: for example black/orange/copper, or black/white/silver.
Based on your overall budget
Papercraft is a smart choice because it lets you build a complete setup without a huge budget. For example, you can start with a trio around 24 € to 30 €: a pumpkin, a wreath, and a mask. Or create a more ambitious scene with 4 to 5 models between 40 € and 50 €. The best approach is to choose one main statement piece, then add two or three supporting elements. That avoids the “random collection” effect and gives a more harmonious result. With free shipping from 50 €, it often makes more sense to plan your atmosphere as a full set rather than as one-off purchases.
Based on the paper and finish you want
The final look depends hugely on the paper you use. A weight of 160 to 220 g/m² works very well for most models. Below that, the structure may feel too flimsy. Above that, some folds become more demanding. Matte paper softens the light and gives a more premium look, while slightly textured paper can enhance the handmade feel. If you want to go further on this topic, the article paper art: trends and creative ideas can also inspire you with modern finishes and styling ideas.
Tutorial: assemble in 5 steps
1. Prepare your tools before you start
Gather everything upfront: printed sheets, scissors or a precision craft knife, ruler, scoring tool if you have one, suitable glue, and a flat work surface. Also set aside 1 to 2 uninterrupted hours for a small model, and more for a detailed mask. This prep helps you avoid 80% of the classic mistakes caused by rushing. Work under good lighting - ideally cool or neutral - so you can clearly read the numbers and spot fold lines.
2. Cut neatly and sort your pieces
Don’t cut everything out in one messy pile. Work sheet by sheet, then group pieces by section if the template allows it. A clean cut directly improves the final assembly: fewer overhangs, sharper angles, cleaner edges. If you’re building a mask, lay the parts out in assembly order so you’re not hunting for the right piece at the wrong moment. This small sorting step saves time and reduces stress.
3. Score the folds before gluing
This is the step beginners often skip, even though it shapes the entire result. Marking the folds gives you crisp edges and a clean volume. Mountain folds and valley folds need to be made consistently. Use a ruler to guide the longest lines. Good pre-folding makes assembly much smoother, especially on angular Halloween models like low poly masks.
4. Glue in small sections - never in a rush
Apply a thin layer of glue to the tabs, then hold for a few seconds before moving to the next one. There’s no need to use too much: excess glue warps the paper and makes the edges messy. Work from the centre outward when possible, or simply follow the template’s recommended order. On masks, regularly check the symmetry as you go. A correction made early takes 10 seconds; too late, it can cost you the whole final look.
5. Shape it and style it properly
Once assembled, let it dry fully before handling or displaying it. Then think about staging: side lighting, dark background, grouped pieces by theme, complementary accessories. A single model can look great; a well-styled model instantly feels more premium. That’s especially true for Halloween, where the mood depends as much on the surrounding setup as on the object itself.
Decor ideas / styling inspiration
The secret to great Halloween papercraft isn’t just the model you choose - it’s how you integrate it into a full setup. A few well-placed elements are often enough to create a truly immersive atmosphere without overcrowding the room.
- “Witch party” entryway: a Halloween wreath on the door, a broom placed nearby, and a 3D pumpkin on the floor.
- Potion buffet: a cauldron at the centre, glass bottles, vintage labels, and a subtle purple LED glow.
- Gothic wall: a raven, a skeleton, and a few black or dried branches against a dark background.
- Costume photobooth: a dragon mask, a skull mask, and a witch hat ready for photos.
- Minimalist chic table: several small papercraft pumpkins, black napkins, LED candlesticks, and a black/copper/burnt orange palette.
Frequently asked questions
Is Halloween papercraft suitable for beginners?
Yes - as long as you choose the right model. A pumpkin or wreath is far more beginner-friendly than a complex mask. If it’s your first try, start with a simple shape so you can understand how tabs, folds, and gluing work.
How long does it take to assemble a model?
Expect around 30 to 90 minutes for a simple model, and 2 to 4 hours for a more detailed piece like a mask or a larger decorative structure. The timing mostly depends on your experience level, how carefully you handle the folds, and the number of pieces.
What paper should you choose for the best result?
Paper between 160 and 220 g/m² is generally ideal. It gives you enough rigidity to hold the shape while still being foldable. Avoid paper that’s too thin, as it bends easily, especially on larger models or masks.
What glue should you use for papercraft?
A precise paper glue that doesn’t soak the sheet too much is the best option. The key is to apply a thin layer, not a thick blob. Too much glue weakens the finish and can leave visible marks along the edges.
Can you really wear papercraft masks for Halloween?
Yes - the masks are designed for that. They’re light and practical for parties, photo shoots, or cosplay events. For extra comfort, check the fastening points and fit well before the big day, especially if you plan to wear it for several hours.
Can the models be reused from one year to the next?
Yes, if you store them properly away from moisture and crushing. That’s one of papercraft’s strengths: seasonal decor that’s lightweight, stylish, and not necessarily disposable. Flat storage or shelf storage works well for protecting most creations.
How do you avoid the most common assembly mistakes?
The most important thing is not to rush. Cut neatly, score every fold before gluing, and work in small sections. Regularly check alignment and symmetry. Most problems come from hurrying, not from a lack of skill.
Is Halloween papercraft suitable for flat or apartment decor?
Absolutely. In fact, that’s one of its biggest strengths: you can create a strong atmosphere without cluttering the space. A wreath, two pumpkins, and one wall piece are often enough to transform a room without making it feel visually heavy.
Conclusion - where should you start?
If you want to start without stress, begin with a pumpkin or a wreath: they’re the simplest options and the easiest to showcase. If your goal is a striking costume, go for a mask like the dragon or the mouse skull. And if you want to build a real party atmosphere, think in a trio: one centrepiece, one wall element, one storytelling accessory. That combination is what gives Halloween papercraft its real power. You’re not just creating objects - you’re building a setting, a silhouette, a mood. And that’s exactly what makes Halloween more memorable.
Ready to create Halloween decor that stands out? Discover our most eye-catching models, choose your theme, and build an atmosphere that feels like you on Papercraft-3D.com - with free shipping from 50 €.