Not sure whether to go for a papercraft PDF you can download right away or a physical kit that’s ready to use? You’re not the only one. When you’re just starting out, or when you want to gift a DIY project, the format really changes the experience: budget, lead time, tools, freedom to customise, final look… it’s not all the same. In this guide, I’ll help you choose the right format based on your skill level, available time, and decor goal. You’ll see why the keyword “papercraft pdf kit” is showing up everywhere in 2026 searches, which models make the best starting point, how to compare real cost vs assembly comfort, and how to nail your build in 5 simple steps. By the end, you’ll know exactly whether to print at home or go for a pre-prepared format.

Why papercraft PDFs are booming in 2026
In 2026, papercraft has levelled up. It’s no longer just a niche craft hobby: it’s become a real decor format, a gift idea, and a screen-free activity people genuinely love. And in that shift, the PDF format has taken a huge share. Why? Because it fits the way people buy now: instant access, controlled budget, personalisation, and independence.
In practical terms, a PDF model lets you start the same day. You download the file, print it on the right paper, cut, fold, glue. No waiting for shipping. For a lot of makers, that’s a game changer: you get a decor idea for a birthday, a kid’s room, a party, or a photo shoot, and you want to make it happen now. That’s especially true for 3D numbers, small wall trophies, and simple animal models.
Another big plus: the entry cost is low. A solid PDF template here starts at €4 or €6, which makes it easy to try papercraft without spending much upfront. Of course, you’ll need paper, ink, and glue too, but even with that added in, the price often stays very competitive, especially if you print several copies of the same model. That’s one of the real strengths of digital files compared with physical kits, which focus more on convenience than flexibility.
PDFs are also winning because they give you more control. You choose the paper weight, the colour, the print scale when the model allows it, and sometimes even the finish. For birthday decor, for example, you can match your numbers to the party palette. For a gift, you can reprint a failed piece without buying the whole thing again. And if you’re already creative, that freedom is often worth the extra prep step.
There’s also the learning side. A PDF teaches you the fundamentals of papercraft: spotting mountain and valley folds, managing assembly order, understanding how a 3D shape comes from flat surfaces. If you want to improve, it’s a great training ground. On that note, I also recommend our article how to choose paper for papercraft, essential for avoiding classic paper weight mistakes, and our guide which adhesive to choose for papercraft, which really makes a difference in the final finish.
Physical kits still have a real place: they simplify prep, reassure beginners, and remove the printing question. But if PDFs are dominating so strongly in 2026, it’s because they match a more agile way of buying and making. You pay less, start faster, customise more freely, and reproduce the model whenever you need. Put simply: if you like making things yourself, a PDF isn’t a “lighter” version of papercraft. It’s often the smartest format.
The best papercraft PDF models to build if you’re still hesitating between a PDF and a kit
If you really want to compare PDFs and physical kits properly, the best approach is to look at real examples. Not every model requires the same precision or the same prep time. Some are perfect for discovering digital papercraft on a small budget, while others show just how creative, decorative, and cost-effective the PDF format can be. Here’s a selection of models that are especially useful if you want a clear opinion.
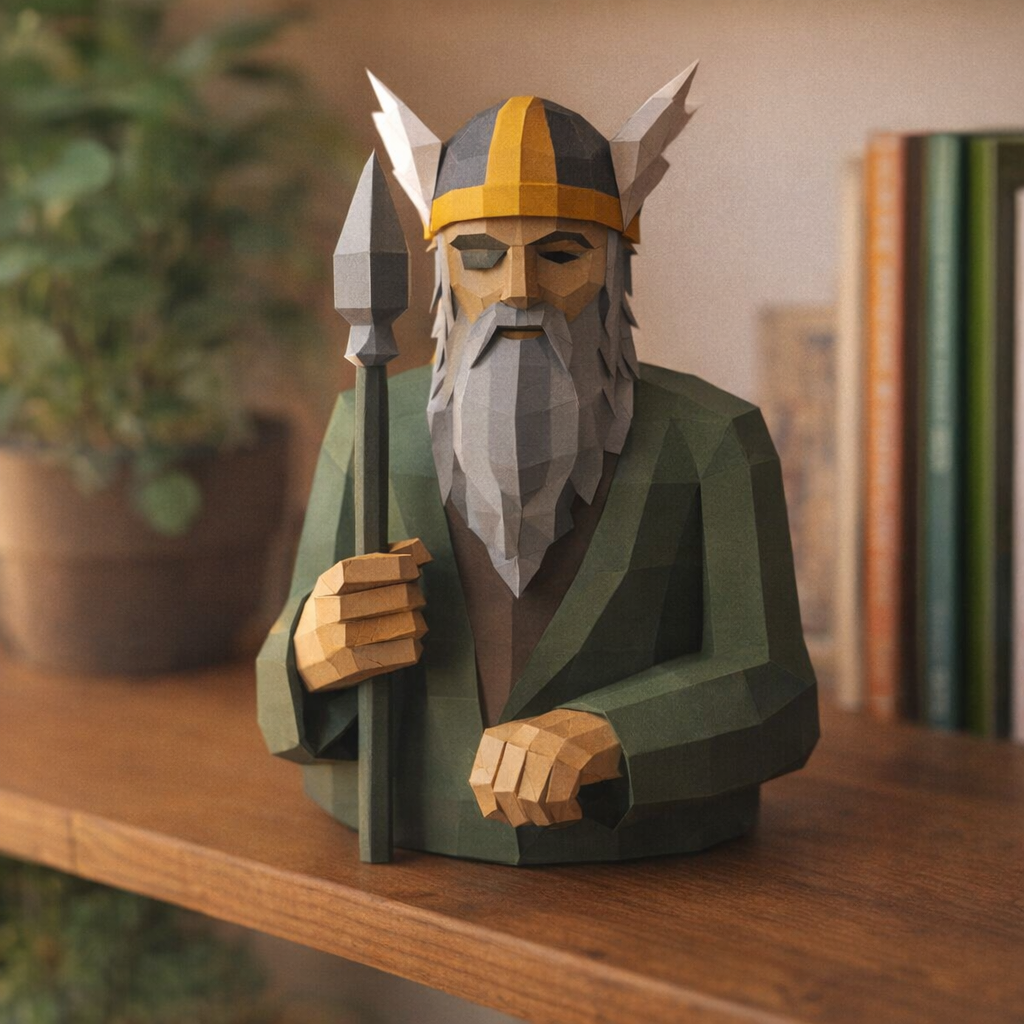
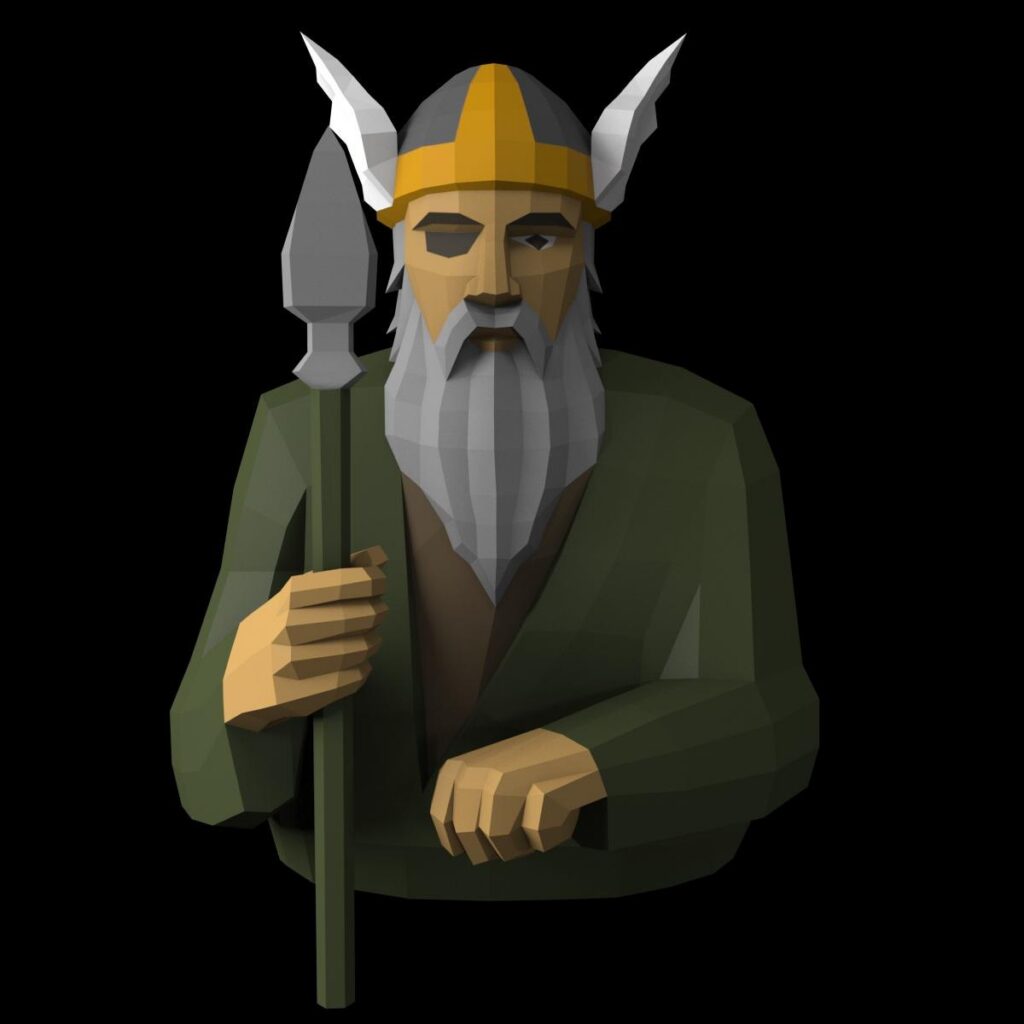
3D origami-style men’s mask papercraft
Price: €4 • Level: intermediate
If you want to understand the appeal of PDFs on a visually striking project, this men’s mask is a great test. The low-poly look is modern, graphic, and ideal for wall decor, events, or even a creative costume. This kind of model really shows the digital advantage: you can print on crisp white, coloured, or textured paper depending on the effect you want. With a physical kit, you’d save prep time, but you’d lose some of that visual freedom. At €4, it’s also an easy project for deciding whether you prefer the independence of a PDF or the comfort of an all-in-one kit.
Small 3D elephant head papercraft trophy
Price: €4 • Level: beginner to intermediate
This small elephant head trophy is exactly the kind of model that makes people love papercraft PDFs. It’s decorative, compact, quick to build, and stylish enough to display in a living room, office, or child’s bedroom. Compared with a physical kit, the big advantage is that you can test different paper colours and completely change the look without changing the template. It’s also a great project for learning how to sharpen your folds and get clean edges. If you want a first decorative model that won’t keep you stuck for hours, it ticks almost every box.
3D baby rabbit papercraft
Price: €4 • Level: beginner
For a family activity or a soft decorative piece to place on a shelf, the baby rabbit is an excellent pick. This model shows one of the biggest strengths of PDFs really clearly: flexibility. You can print at home, reprint a piece if needed, and turn a creative activity into a shared moment with an older child. It’s not a “gimmick” model either: it teaches you how to follow a simple assembly logic while still giving you an adorable result. If your hesitation comes from being afraid to start badly, this kind of template feels far less intimidating than a big project, while still costing less than a physical kit.
Small 3D koala papercraft
Price: €4 • Level: beginner
The small koala is perfect if you want a cute, quick project that doesn’t feel intimidating. It’s the kind of model that proves a PDF isn’t only for highly equipped hobbyists. With a home printer, decent paper, and precise glue application, you can get a clean result without complicated tools. On top of that, children’s decor models are often the ones where colour customisation makes the biggest difference. If you want to compare PDF and kit in real conditions, start with a small model like this one: you’ll immediately see whether you enjoy the printing step or would rather go for something more ready-to-build.
3D number 0 papercraft
Price: €6 • Level: beginner to intermediate
Number models probably show the economic power of PDFs better than anything else. For a birthday, baby shower, wedding, or shop window display, being able to print on demand changes everything. The number 0 is useful for ages, dates, or “2026” style compositions. With a physical kit, you’d need to buy each prepared element separately; with a PDF, you control the size, colours, and number of copies. That’s especially useful for decorators, parents, or content creators who want impactful decor without blowing the budget.
3D number 1 papercraft
Price: €6 • Level: beginner to intermediate
The number 1 is one of the most searched-for models for first birthdays, but it also works beautifully in date-based decor. It’s a great example of a model where PDF quickly becomes more cost-effective than a physical kit, especially if you want to build a full, consistent setup. You choose your paper, match the shade to the party theme, and print whenever you want. If your goal is mainly decorative, numbers are also easier to get right than a complex animal sculpture, while still delivering strong visual impact on a table or candy bar.
3D number 2 papercraft
Price: €6 • Level: beginner to intermediate
The number 2 is ideal for party decor, but also for building full years with other models from the same series. This is where the PDF advantage becomes obvious: you can create a consistent set without depending on physical stock or separate shipping. The digital format also lets you reprint if one piece is cut badly, which takes a lot of stress out of assembly. For anyone who wants a useful, practical project with immediate decor value, it’s a safe bet.
3D number 3 papercraft
Price: €6 • Level: beginner to intermediate
The number 3 is a favourite for children’s birthdays and event decor. It also highlights another key point in the “papercraft pdf kit” debate: repeatability. With a physical kit, you usually get one shot. With a PDF, you can make a test version first, then a cleaner final version on premium paper. That’s incredibly useful when you’re preparing an important setup. The model stays approachable, doesn’t demand expert-level skills, and still gives you a highly photogenic 3D object at a low price.
3D number 4 papercraft
Price: €6 • Level: beginner to intermediate
The number 4 is a smart pick if you’re preparing age decor, a date display, or a personalised scene. In a PDF vs physical kit comparison, its main strength is that it belongs to a modular range. You can pair it with other numbers to create exactly what you need, without overpaying for a ready-made set. Here, PDF clearly remains the most flexible option for event projects. If you like planning decor that feels precise and fully coordinated, that’s a strong argument for downloading.
3D number 5 papercraft
Price: €6 • Level: beginner to intermediate
The number 5 shows perfectly that a digital template isn’t a fallback option, but a real creative tool. You can turn it into the centrepiece of a birthday table, enhance it with paper flowers, LEDs, or a photo backdrop. A physical kit would save time, yes, but if you want to integrate the model into a wider decor setup, the PDF gives you more room to play. It’s also especially appealing for smaller budgets, because the visual impact-to-price ratio is excellent.
3D number 8 papercraft
Price: €6 • Level: intermediate
The number 8 usually requires a bit more attention because of its inner volumes, which makes it a good test if you really want to know whether the PDF format suits you. It’s not difficult in the strict sense, but it does ask for better template reading and more consistent gluing. That’s exactly where some people will prefer a physical kit because it feels more reassuring. But if you want to improve while staying fully in control of the final result, PDF is more rewarding. You can even do a test run on standard paper before printing the final version on beautiful cardstock.
3D origami-style red heart papercraft
Price: €7 • Level: beginner to intermediate
The red heart is one of the best models for measuring the emotional difference between a PDF and a kit. For Valentine’s Day, romantic decor, a wedding, or a shop display, it’s easy to understand and instantly expressive. In PDF format, you can print it exactly when you need it, and even in different sizes or paper variations depending on the result you want. This is exactly the kind of project where instant download makes all the difference. If you want a model that looks beautiful, feels meaningful, and isn’t too technical, this is a very smart choice.
Want to compare more digital models before deciding between a papercraft PDF and a ready-to-assemble kit? Browse the full collection on Papercraft-3D.com and you’ll quickly spot the formats that work best for birthday decor, kids’ activities, gifts, or a more ambitious wall piece.
How to choose between a papercraft PDF and a physical kit
Choose based on your real skill level, not your excitement in the moment
The first criterion is your level. If you’ve never made papercraft before, PDF is still absolutely possible, but you need to be honest about your tolerance for prep work. Printing, checking scale, choosing the right paper, cutting neatly, scoring folds: these steps take a bit of method. If you enjoy understanding how things work and making them yourself, PDF is a great entry point. If you mainly want to assemble without asking questions, a physical kit is more comfortable. A lot of disappointment comes from a mismatch between creative enthusiasm and actual patience.
Compare the total cost, not just the listed price
A €4 or €6 PDF looks unbeatable, and often it is. But if you want a fair comparison with a kit, add paper, ink, glue, and possibly a fresh blade or cutting mat. If you’re already equipped, PDF keeps a huge financial advantage. If you’re starting from zero, the gap is smaller on the first project, then quickly swings back in favour of digital by the second or third build. That’s also why small templates are ideal when you’re getting started: they help your basic tools pay for themselves fast.
Think about timing: instant access vs convenience
PDF wins without debate when it comes to speed. You download it and you can start today. For a decor emergency or a last-minute gift idea, that’s massive. A physical kit takes shipping time, but simplifies the experience once it arrives. In practice, if your deadline is close and you have basic equipment, PDF is often the best answer. If you’re planning more calmly and want to reduce the amount of setup, a kit still makes sense.
Look at how much customisation you want
If you want a precise colour, iridescent paper, a premium matte finish, or several coordinated copies, PDF is clearly the stronger choice. It puts the design in your hands. That’s especially true for numbers, hearts, small decorative animals, or themed projects. A physical kit makes more sense if you’re happy with the intended look and your main goal is to save time. In short: the more you want to personalise, the more logical PDF becomes.
Think about the final use of the object
For a relaxing workshop, solo creative time, or temporary decor, PDF is often ideal. For a gift meant for someone with zero tools at home, a physical kit may feel safer. If the finished object needs to be recreated several times, like event decor or a photo prop, PDF quickly becomes unbeatable. If, on the other hand, you want one simple, guided experience, the kit may suit you better.
Check your workspace
One detail people often forget: do you actually have space to print, cut, and let things dry? PDF requires a minimum of organisation. A clear table, good light, and 30 to 60 uninterrupted minutes already make a huge difference. A physical kit doesn’t remove the need for focus, but it does reduce the logistics. If you work in a small space or a busy environment, choose simple PDF models or lean toward a more prepared format.
Tutorial: how to assemble a papercraft PDF in 5 steps
1. Download and check the file
Start by opening the PDF on a computer or a tablet large enough to read the instructions clearly. Check the number of pages, whether the tabs are numbered, and the printing recommendations. Don’t print too fast: look at whether the model needs a precise size or 100% scale. A scale error at the start is enough to throw off the whole build. If you’re new to papercraft, do a one-page test first to check print sharpness.
2. Choose the right paper and print cleanly
For most decorative models, paper between 160 and 220 gsm gives a good balance between rigidity and easy folding. Below that, the object may feel too flimsy; above that, some tabs become harder to close neatly. Use a sharp print setting, with no automatic resizing. If you want to go deeper on this, also read our article on paper art decor trends, which helps you choose a more premium finish depending on the final use.
3. Cut first, then score the folds before gluing anything
Cut all the pieces cleanly first using fine scissors or a precision craft knife. Then score the folds with a bone folder, a blunt stylus, or the back of a non-cutting blade. This is the step people most often rush, even though it has a huge impact on how clean the final volume looks. A successful papercraft isn’t just well glued: it’s well folded first. Sort the pieces by number or section if needed to avoid assembly-order mistakes.
4. Glue gradually, section by section
Never try to build a large volume all at once. Work in small sections. Use a small amount of glue, hold for a few seconds, then move on. Too much glue warps the paper and dirties the edges. For more complex models, follow the numbering strictly. For simpler forms like a heart, a small animal, or a number, visualise the main shapes first before closing the hardest-to-reach areas. Consistency matters more than speed.
5. Let it dry and refine the final details
Once the object is assembled, let it rest for a few minutes before handling or displaying it. Check the edges, slightly open corners, and any small glue marks. Sometimes you can fix these discreetly with a tiny extra dot of glue or firmer pressure on certain tabs. It’s also the right moment to think about presentation: base, shelf, hanging display, photo backdrop, accent lighting. A good build deserves a good setup.

Decor ideas / styling inspiration
The real joy of papercraft is that a well-made piece instantly changes the feel of a space. PDF is especially strong here because it lets you adapt the colour, size, and theme. Here are 5 setups that work especially well.
- Kids’ birthday: use one or two 3D numbers as a table centrepiece, with matte balloons and a matching coloured backdrop.
- Soft Scandinavian-style room: place a baby rabbit or small koala on a light shelf with a few books and a warm night light.
- Creative gallery wall: combine the men’s mask or elephant trophy with minimalist prints for a more graphic office corner.
- Romantic decor: place the red heart on a console table, surrounded by LED candles and dried flowers for a highly visual gift effect.
- Photo shoot or shop window: create a date or age using several papercraft numbers, playing with height and side shadows.
Frequently asked questions
Is a papercraft PDF really cheaper than a physical kit?
Yes, in most cases, especially if you already own a printer and basic tools. The real cost depends on paper, ink, and glue, but PDFs become very cost-effective as soon as you make several projects or reprint a model.
Can a beginner start with a PDF?
Yes, as long as you choose a simple model. Small animals, hearts, or some number models are much more accessible than a large mask or complex sculpture. The most important thing is choosing a template that fits your level and not skipping the folding step.
What paper should you use for a papercraft PDF?
Most of the time, paper between 160 and 220 gsm works very well. For a small model, 160–180 gsm is comfortable. For larger decor pieces, 200–220 gsm gives better rigidity. Avoid standard 80 gsm office paper, which is too thin for a clean, polished result.
Is a physical kit easier to assemble?
Generally yes, because it removes the printing step and sometimes part of the prep work. That said, the actual assembly difficulty still depends mainly on the shape of the model. A complex kit is still complex; it’s just quicker to get started with.
Can you reprint a PDF model if you make a mistake?
Yes, and that’s one of its biggest strengths. If you mess up one part or want to remake the model on better paper, you can start again without buying a whole new product. That’s especially useful for practice, events, and learning.
Can the final result of a PDF look as good as a kit?
Absolutely, and sometimes even better if you choose high-quality paper. The final look mainly depends on three things: cutting precision, fold sharpness, and glue control. With good cardstock, a PDF template can deliver a very premium result.
Which model should you choose to test the PDF format without stress?
I’d recommend a small decorative model like the baby rabbit, small koala, elephant head, or a number if you need something for an event. These projects are simple enough to learn without frustration, while still giving you a genuinely decorative result.
Where can you find more advice before getting started?
You can read our guide papercraft dinosaur: complete guide to understand the assembly logic behind more ambitious volumes, along with our articles dedicated to choosing paper and adhesive so you can avoid beginner mistakes.
Conclusion — what should you start with?
If you want the simple answer, here it is: choose a papercraft PDF if you want to start fast, spend less, customise the result, and genuinely learn the assembly logic. Choose a physical kit if you’d rather reduce prep work and maximise convenience from the moment it arrives. For most everyday decor projects, PDF is now the most flexible and cost-effective format. My advice: start with a small, practical model, like a decorative animal, a heart, or a number linked to an event. You’ll instantly see whether you enjoy the independence that digital files give you. And in many cases, that freedom is exactly what makes all the difference.
Ready to test the right format for your next project? Pick a papercraft PDF model on Papercraft-3D.com, print it, build it, and go from idea to decor in just a few hours. You’ll also get an automatic 10% off plus free shipping from €50.