This free 3D paper shooting star craft is a fresh Papercraft-3D project page for anyone who wants to share a real paper creation in a craft challenge, link party or family DIY roundup. It keeps the downloadable template on the official free model page, then gives a simple, public tutorial page with a finished-image preview, materials list and fold-and-glue assembly steps.
Free printable shooting star papercraft PDF
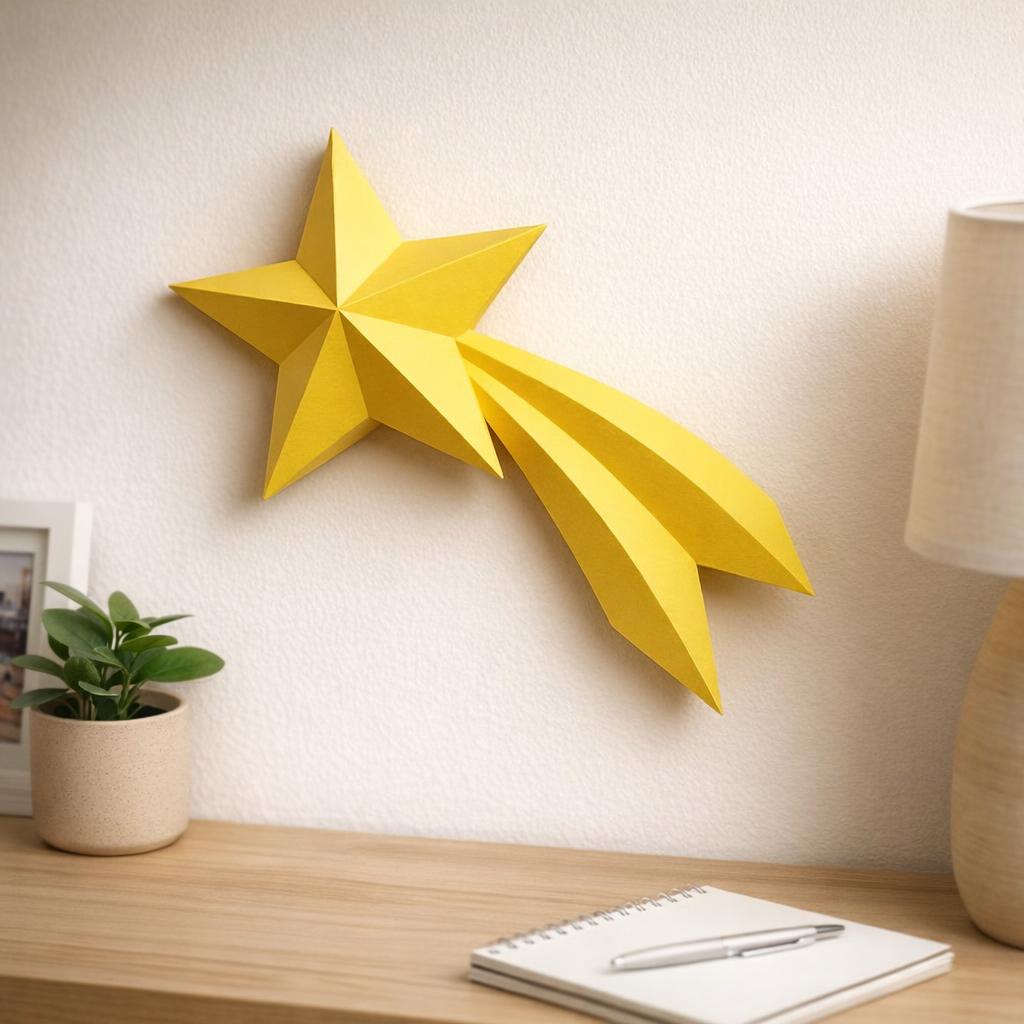
The model used for this tutorial is Shooting Star, a free downloadable Papercraft-3D template. The PDF remains on the official free model page, so you can link to this public tutorial without exposing or mirroring the protected WooCommerce upload file.
Fresh paper project for craft challenges
This page was created as a current paper craft project rather than a recycled old blog post. That makes it a cleaner fit for challenges that ask entrants to share a recent creation and avoid back-linking to older posts. The project is not a premium model preview: it points to a free Papercraft-3D template and can be assembled with ordinary paper craft tools.
Materials
- Free shooting star papercraft PDF printed at 100% scale.
- Cardstock around 160–220 gsm, white or colored.
- Scissors, or a craft knife used on a protected surface.
- A ruler and scoring tool for crisp fold lines.
- Paper glue, glue stick or thin double-sided tape.
- A small brush or scrap paper for keeping glue away from the visible faces.
- Optional thread, removable adhesive or a mini stand for display.
Step-by-step assembly
- Download the free template. Use the official Papercraft-3D shooting star page and keep the PDF for personal crafting.
- Print at actual size. Disable shrink-to-fit so the tabs and numbered edges keep the intended proportions.
- Cut the outside edges first. Keep every tab attached; those small tabs close the low-poly 3D shape.
- Score before folding. A ruler and scoring tool help the star keep sharp geometric facets instead of soft wrinkles.
- Pre-fold the template. Fold along each marked line once before adding glue so the final assembly feels predictable.
- Glue in short sections. Match the tabs to their edges, press gently, then let each join set before moving to the next one.
- Close the final points slowly. The star shape looks best when the last tabs are aligned before the glue dries.
- Display or photograph it. Place the finished model near a window, on a craft desk or as part of a handmade party backdrop.
Ideas for using the finished paper star
- Make one bright star as a classroom or kids’ craft table sample.
- Print several templates on different colors for a handmade garland.
- Use metallic or pearlescent cardstock for a party, nursery or holiday decoration.
- Photograph the assembled model on a neutral background before submitting it to a paper craft challenge.
- Pair it with other small free papercraft models for a DIY space-themed display.
Tips for a cleaner low-poly result
Work slowly and score every line before adding glue. Low-poly papercraft depends on crisp folds: if a fold is rounded, the whole model looks less intentional. For children, let an adult handle cutting and scoring, then invite kids to help fold, glue and decorate the finished star.