Kids grow up fast, and what better way to capture their sweetest moments while brightening up their room than with photo frames? From safari-style frames filled with playful animals to DIY collage displays you can make together as a family, there’s no shortage of ideas. In this article, we’ll help you choose—or create—the perfect photo frame: decorative, safe for little ones, and even homemade if you want that personal touch. Get ready to mix creativity with tenderness—your walls are about to tell some beautiful stories!
Why add photo frames to your child’s bedroom?
Decor piece or living memory? For a child, seeing photos of their family, themselves as a baby, or happy shared moments on the wall can be deeply comforting. It makes the room feel warmer, more personal, and more reassuring. According to child decor specialists, looking at familiar faces—mum, dad, grandparents—can have a calming effect on young children (Source). Beyond the emotional side, photo frames also support a child’s development: little ones love commenting on a holiday picture or recognising themselves as a baby. It’s a lovely way to talk about their story and help build a sense of security. And from a decor point of view, frames are an easy, affordable way to personalise the room: they dress up an empty wall in no time and can evolve as your child grows (swap the photo every birthday, for example).
Frames for little ones: safety and softness first
Put safety first: materials and mounting
When it comes to a baby’s room or a young child’s bedroom, safety comes first. Heavy glass frames and sharp metal edges are a no-go. Choose lightweight frames with rounded corners and no glass front to avoid any risk of breakage or injury (Source). Many children’s frames are made from soft wood, shatterproof plastic, or even fabric. If you go for a more classic frame, make sure the back is secure and, if it’s going on the wall, mount it firmly out of reach (decor-friendly double-sided adhesive strips can be very handy for this). A lightweight frame also has the advantage of being far less risky if it ever falls—an important point once baby starts moving around.
Size, colours, patterns: choose based on age
A newborn and a preschooler won’t be drawn to the same visual elements. For a baby (0–2 years), go for simple, high-contrast images. Newborns respond well to black and white or very bright colours in smaller formats that can be placed at their eye level (near the changing table, for example). At this age, a few small frames positioned where they can see them—and securely fixed—can catch their attention and stimulate their developing vision. Aim for a soft atmosphere: frames in pastel shades or light wood fit beautifully into a cosy baby room.
For a young child (3–6 years), you can go bigger and more playful. This is the perfect time for a colourful frame featuring their favourite cartoon character or a family photo collage they can point to and name. Bright colours and fun patterns (animals, stars, and more) will grab their attention and feed their imagination. Don’t hesitate to involve them: “Do you prefer the blue frame or the yellow one?”—they’ll love having a say in the decor of their room.
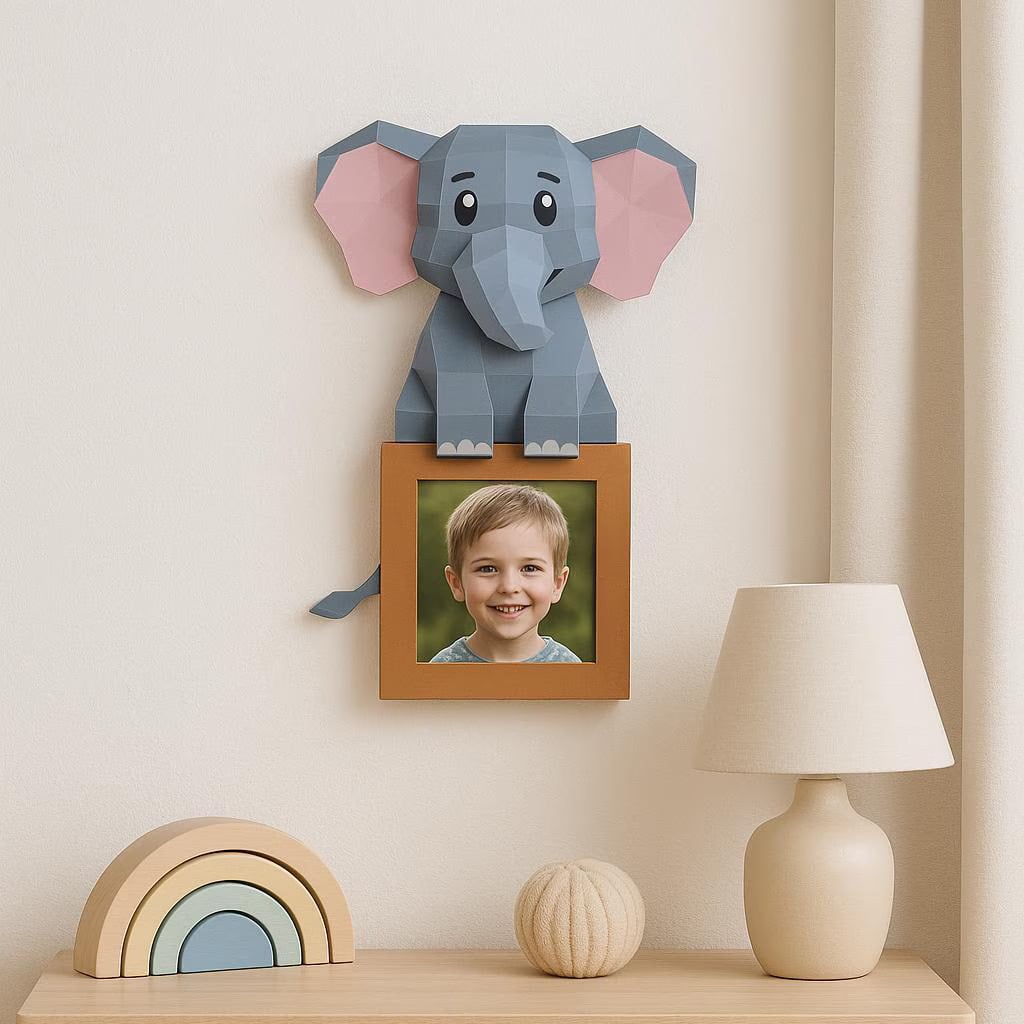
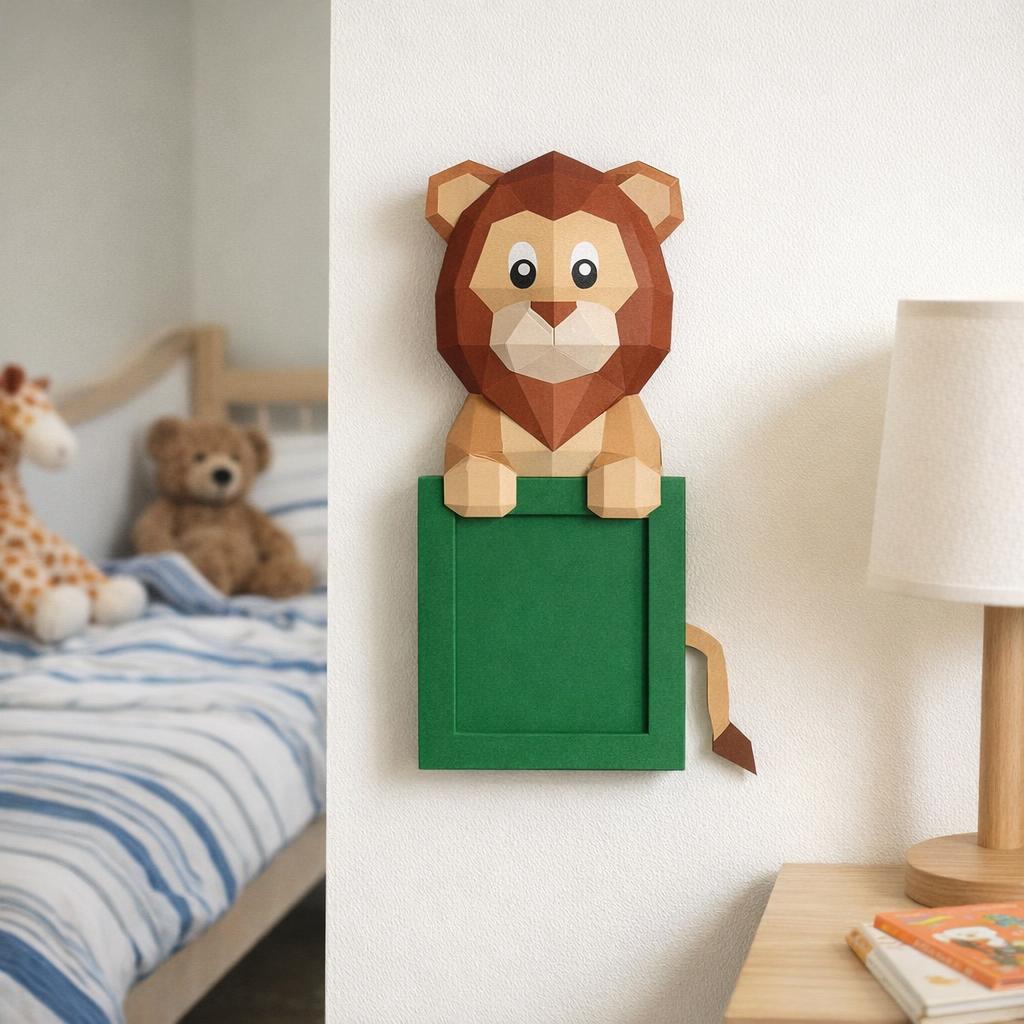
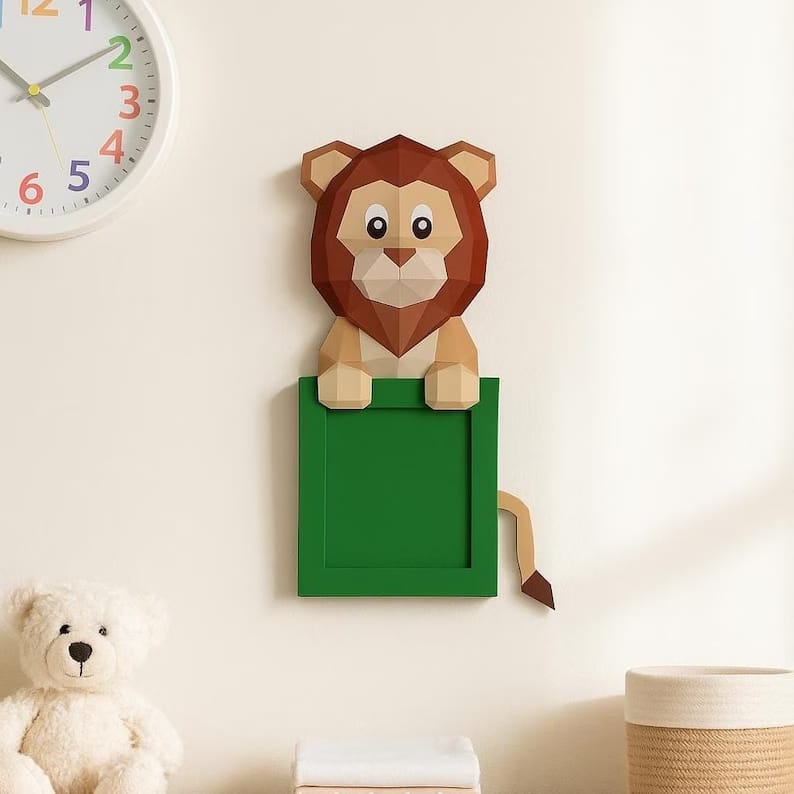
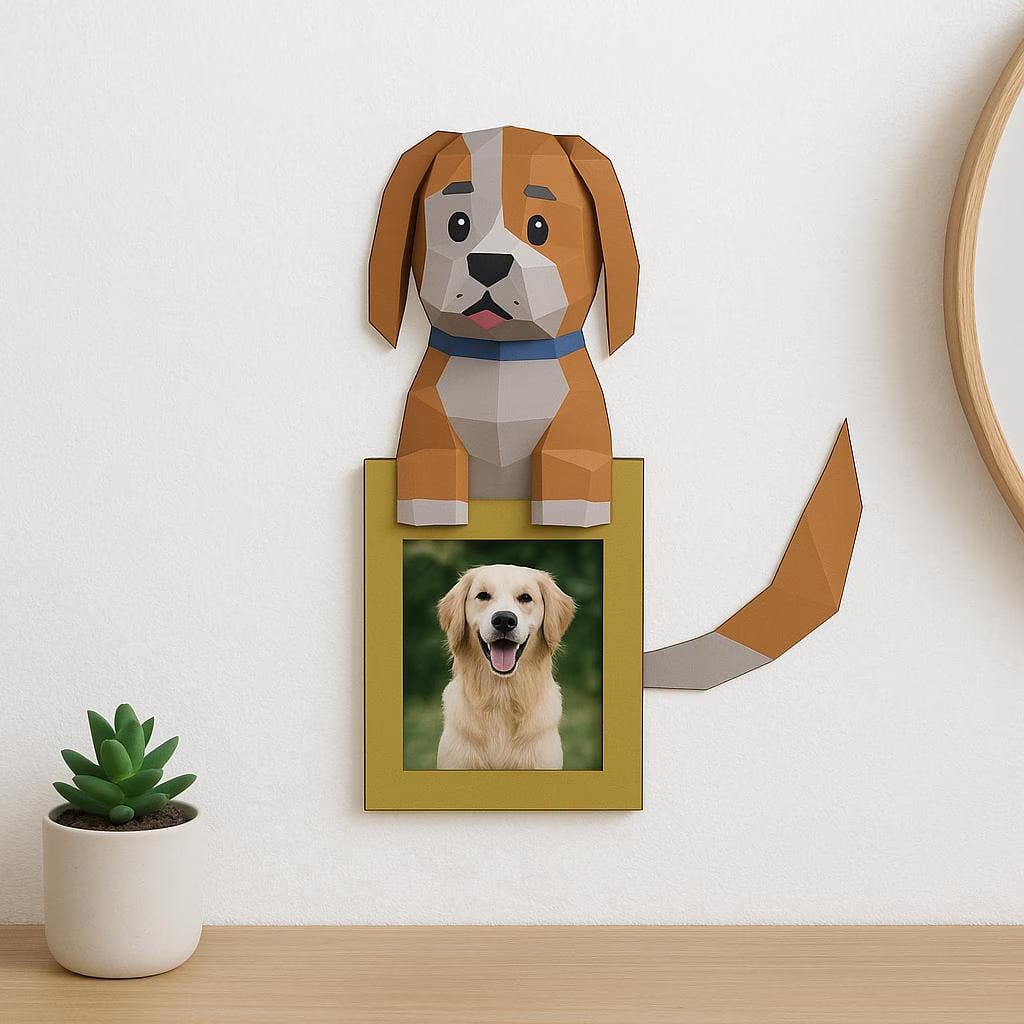
The rise of 3D papercraft photo frames: when decor becomes an activity
What is 3D papercraft?
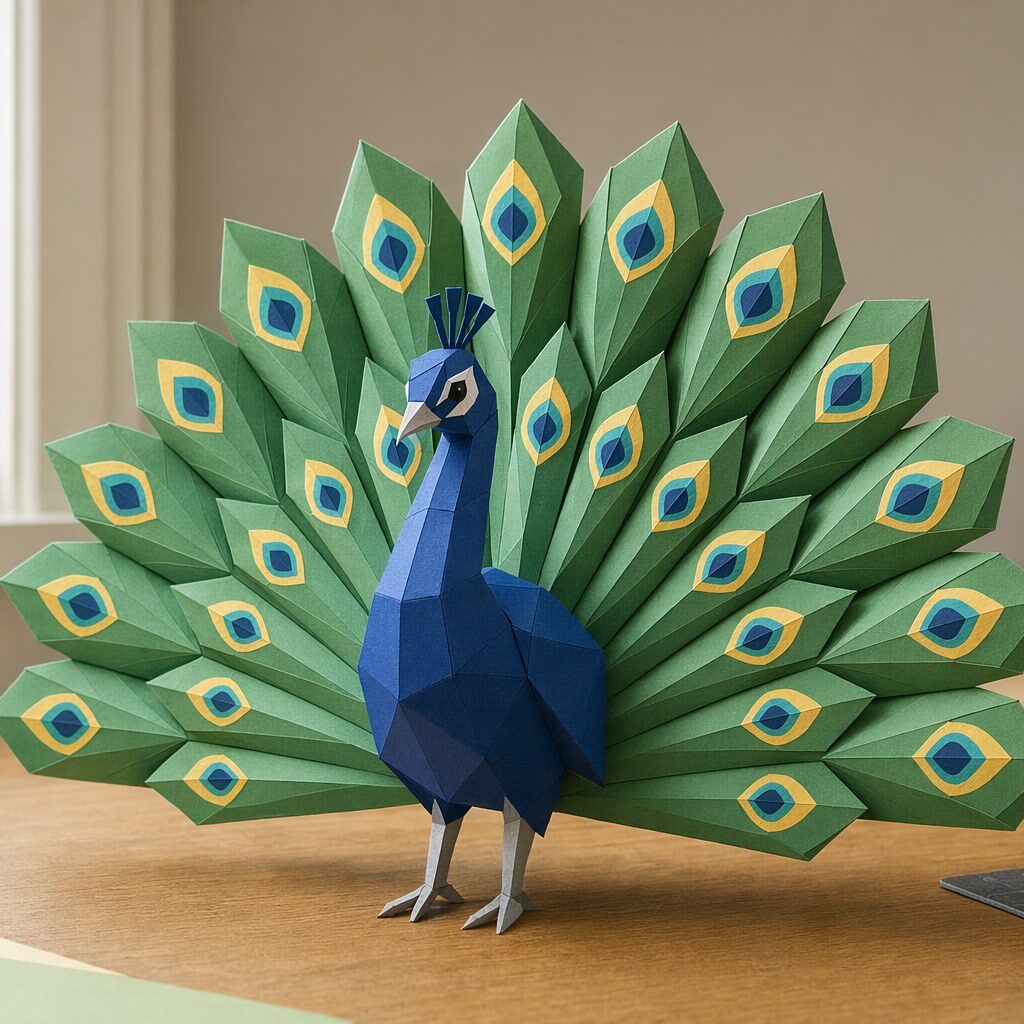
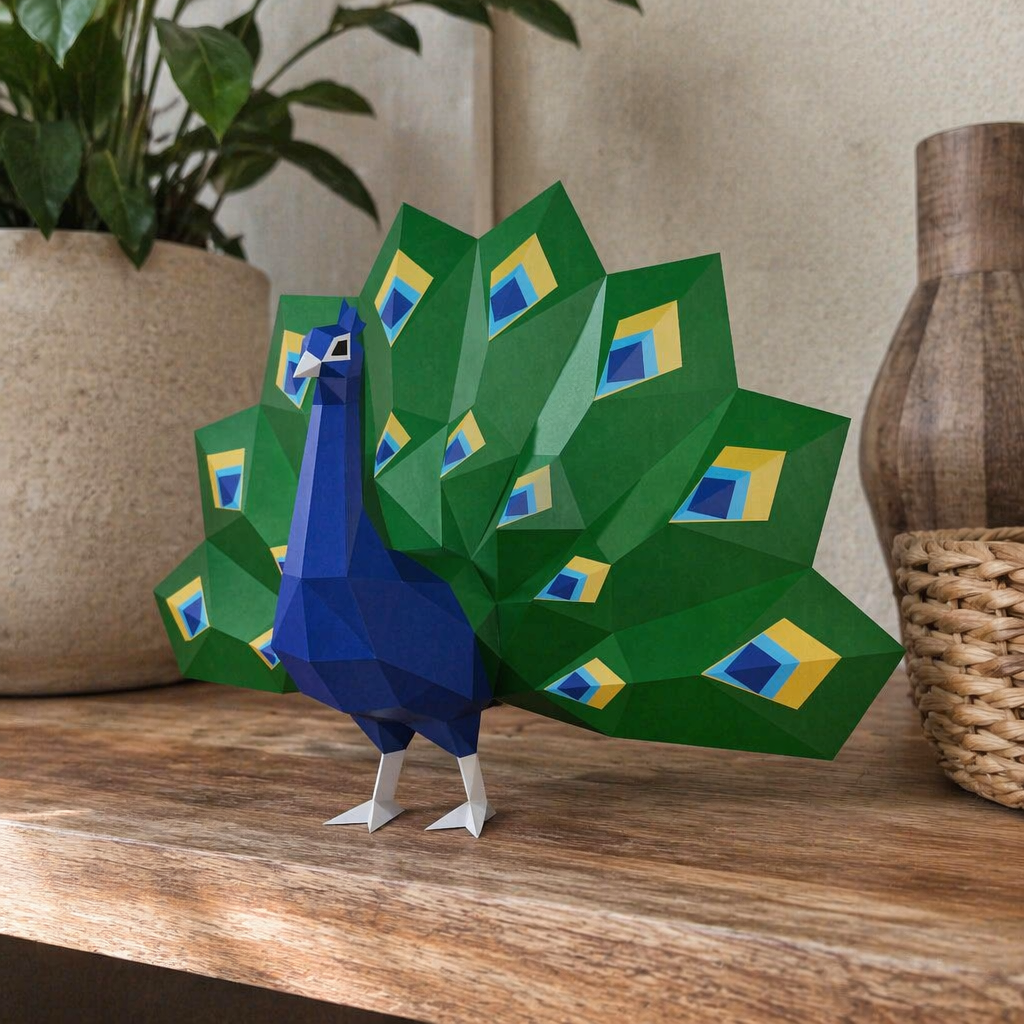
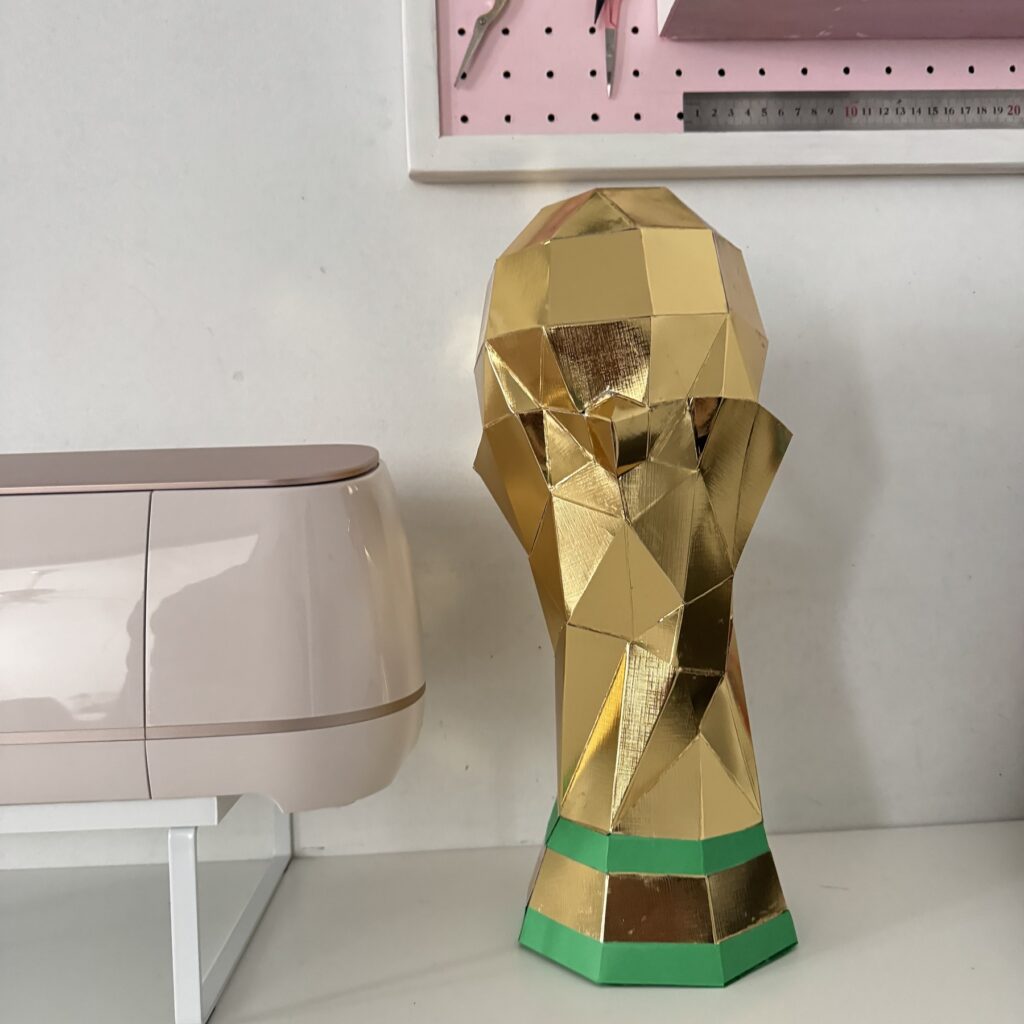
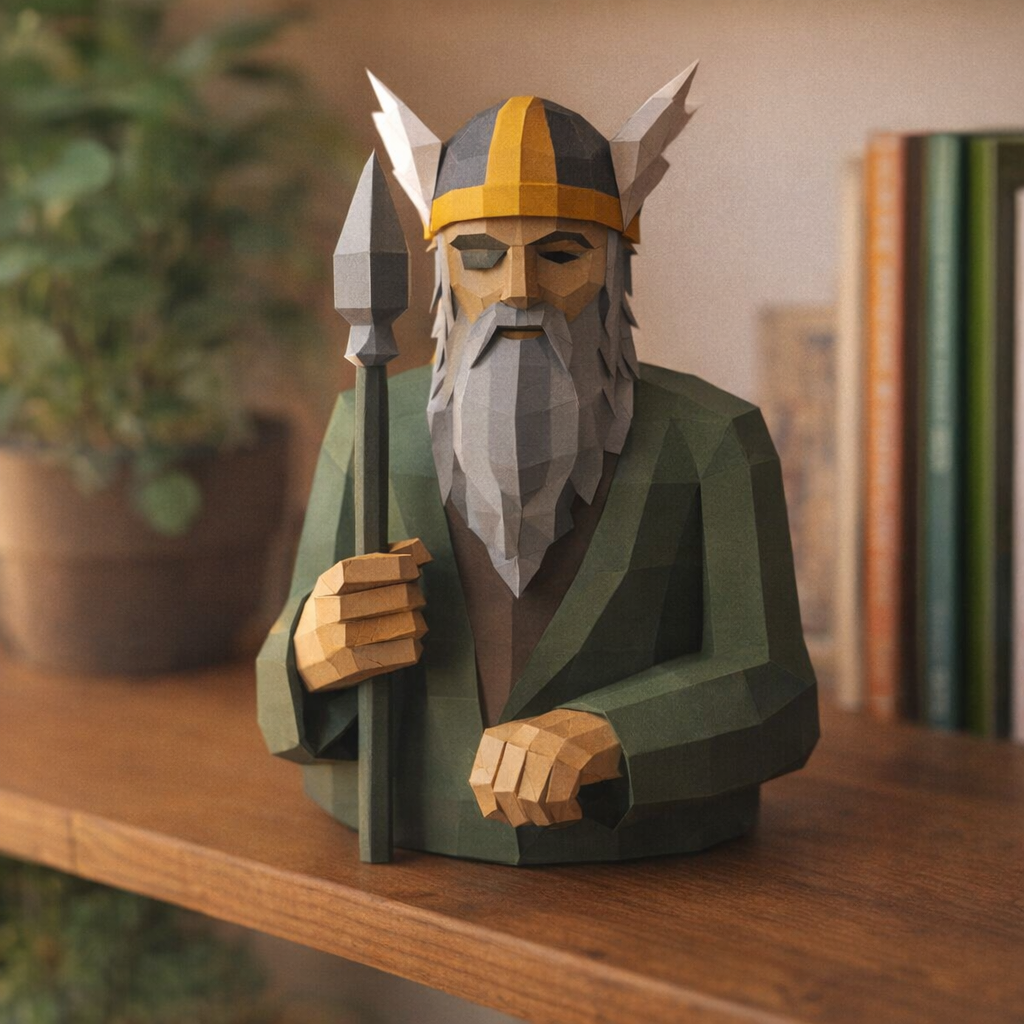
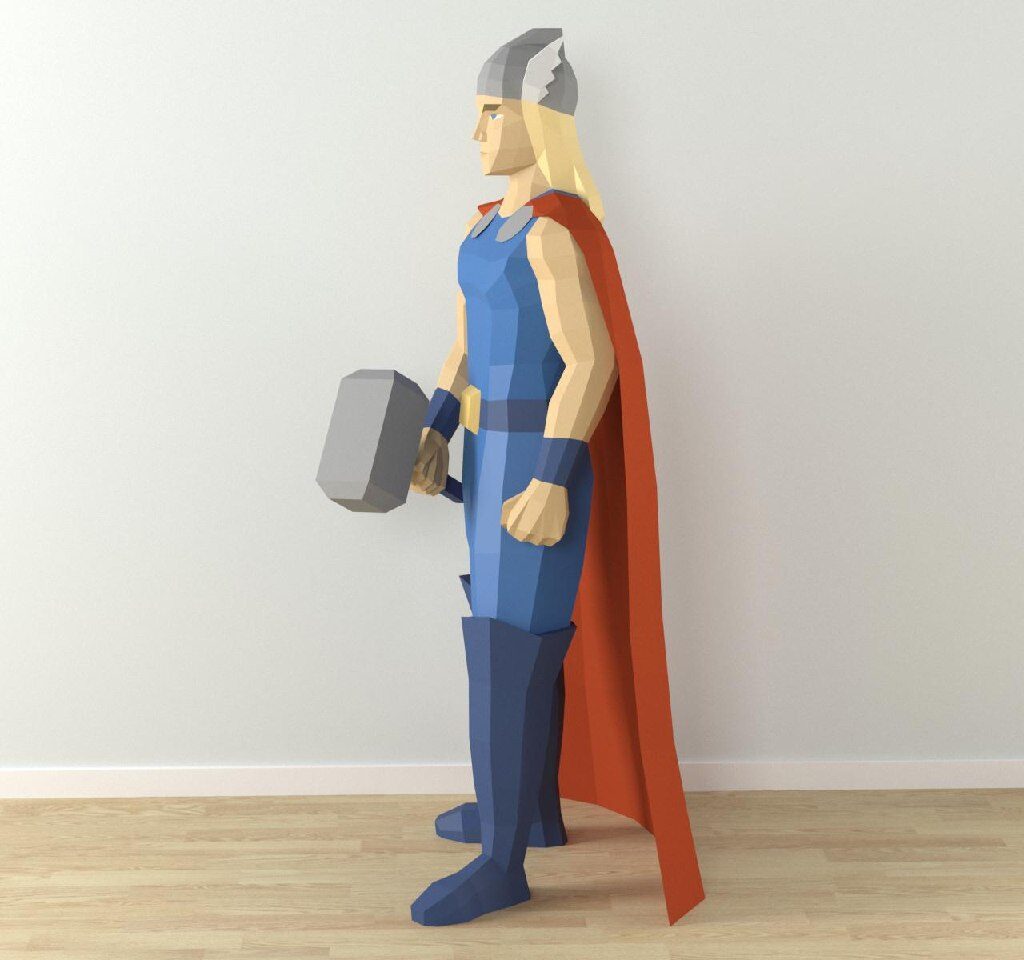
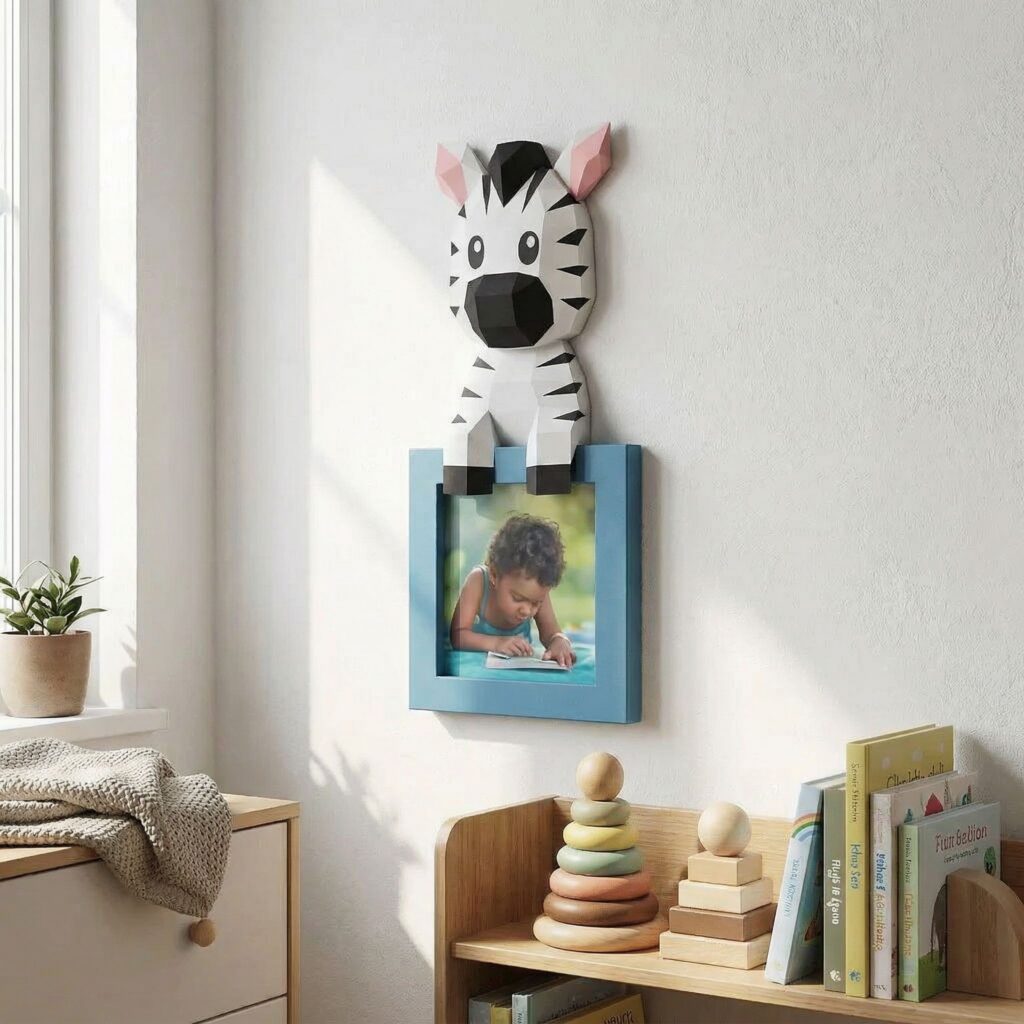
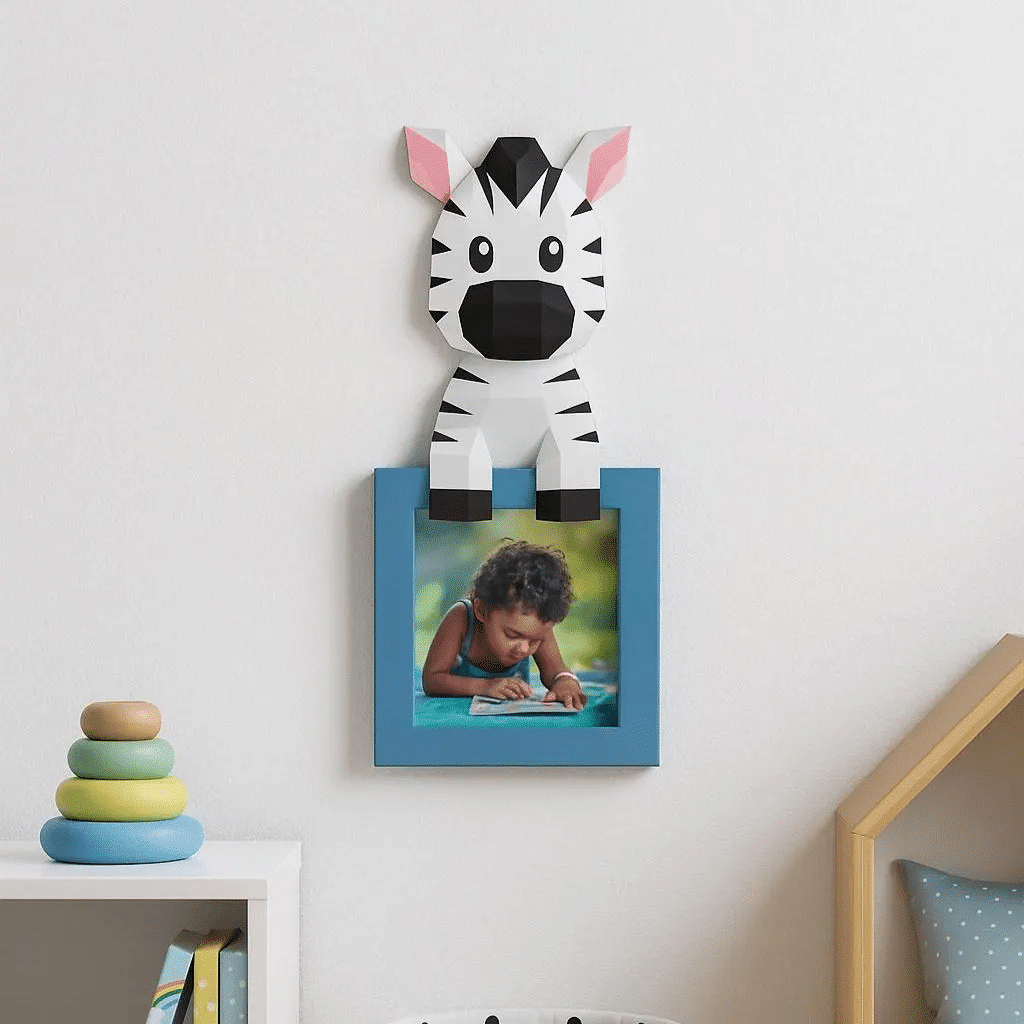
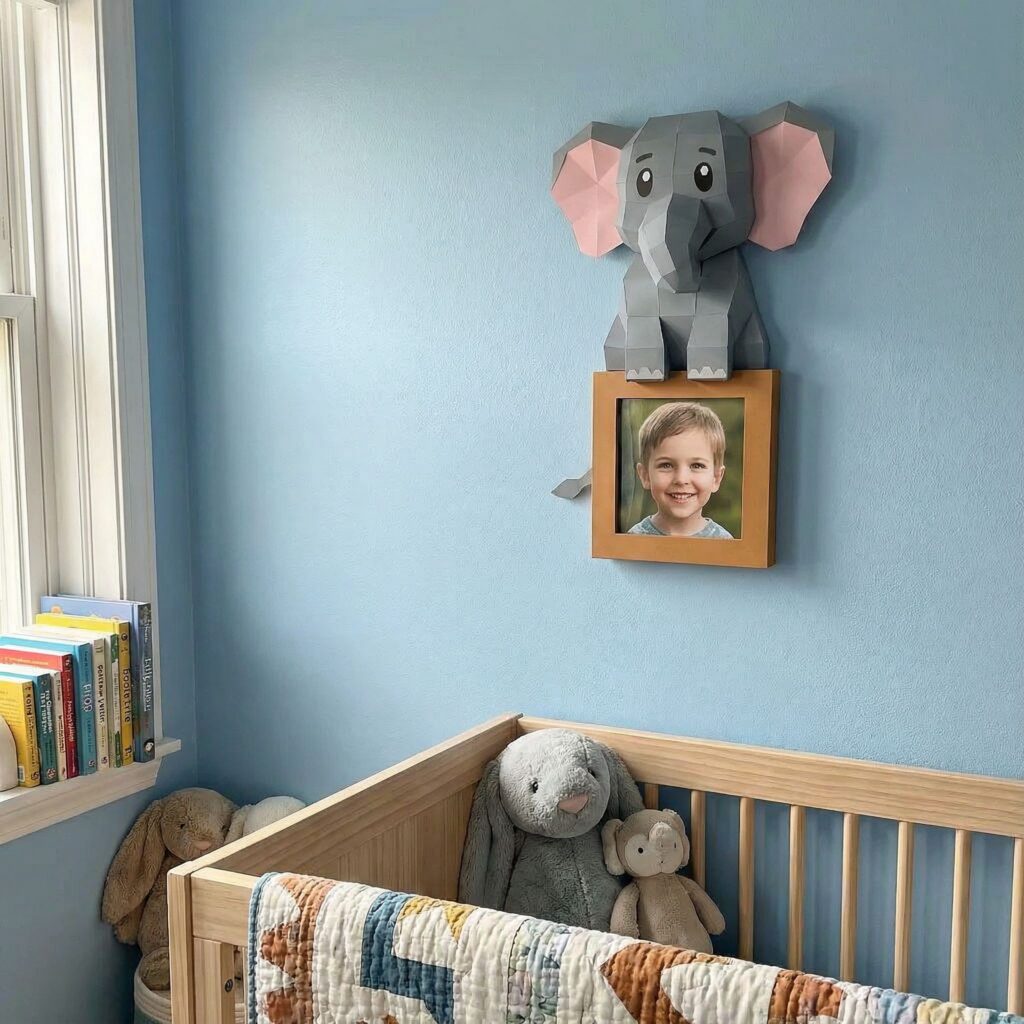
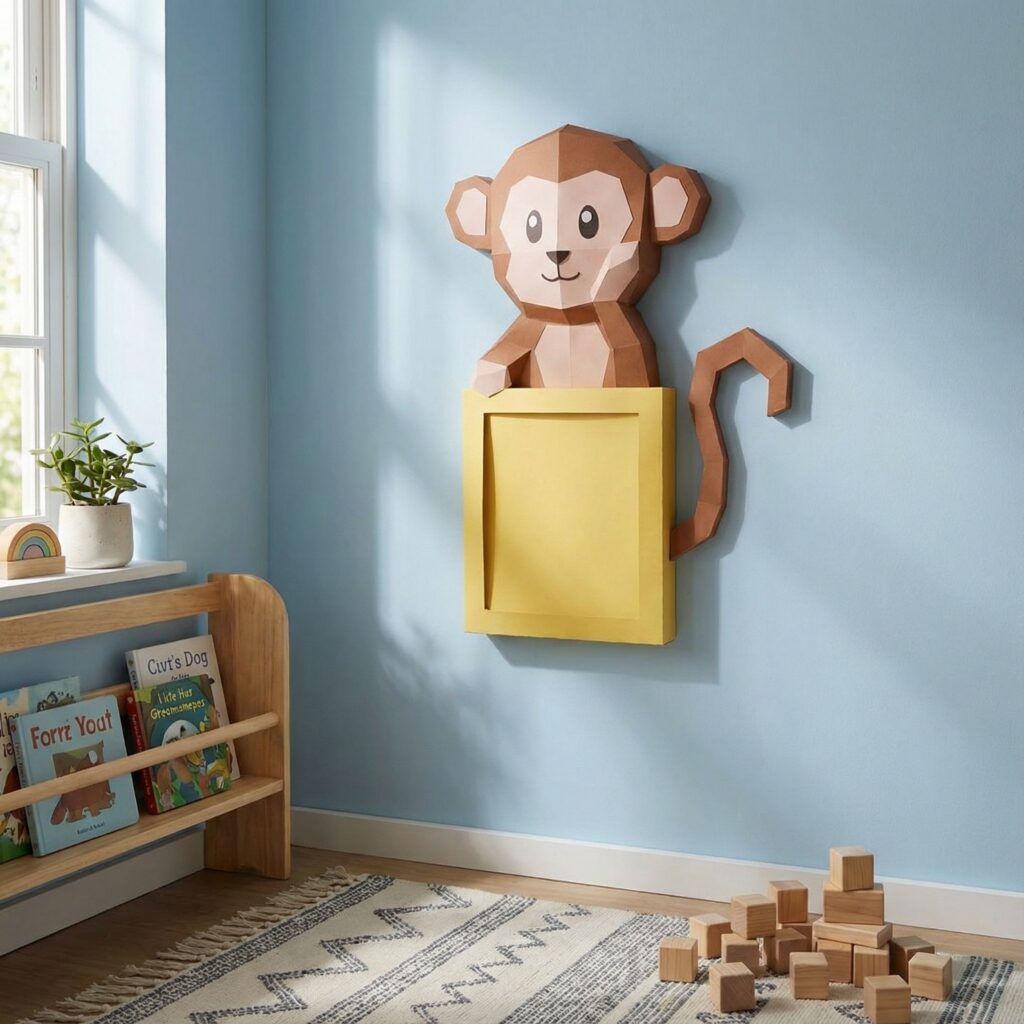
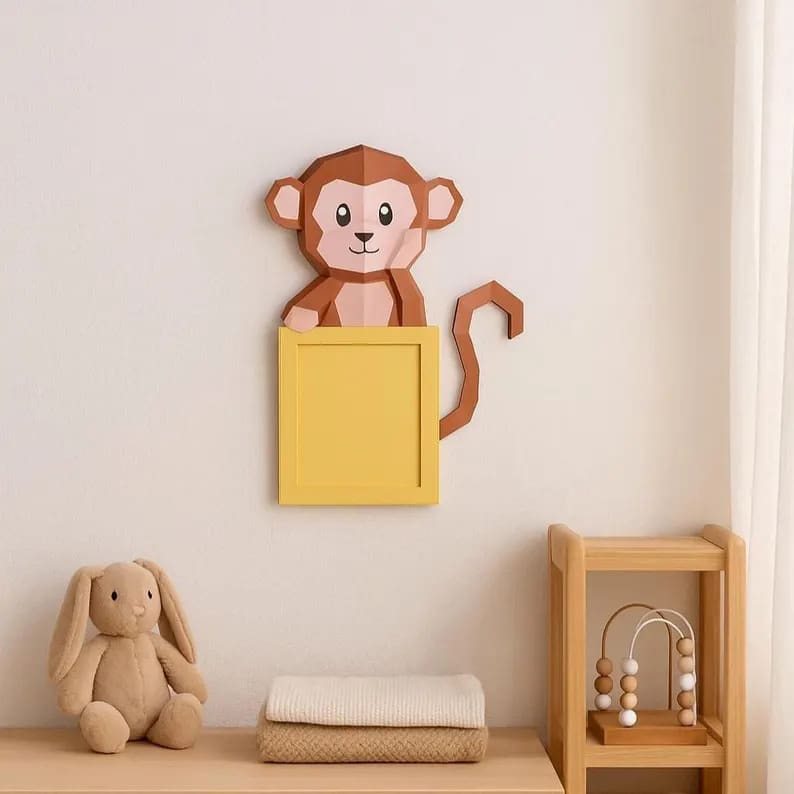
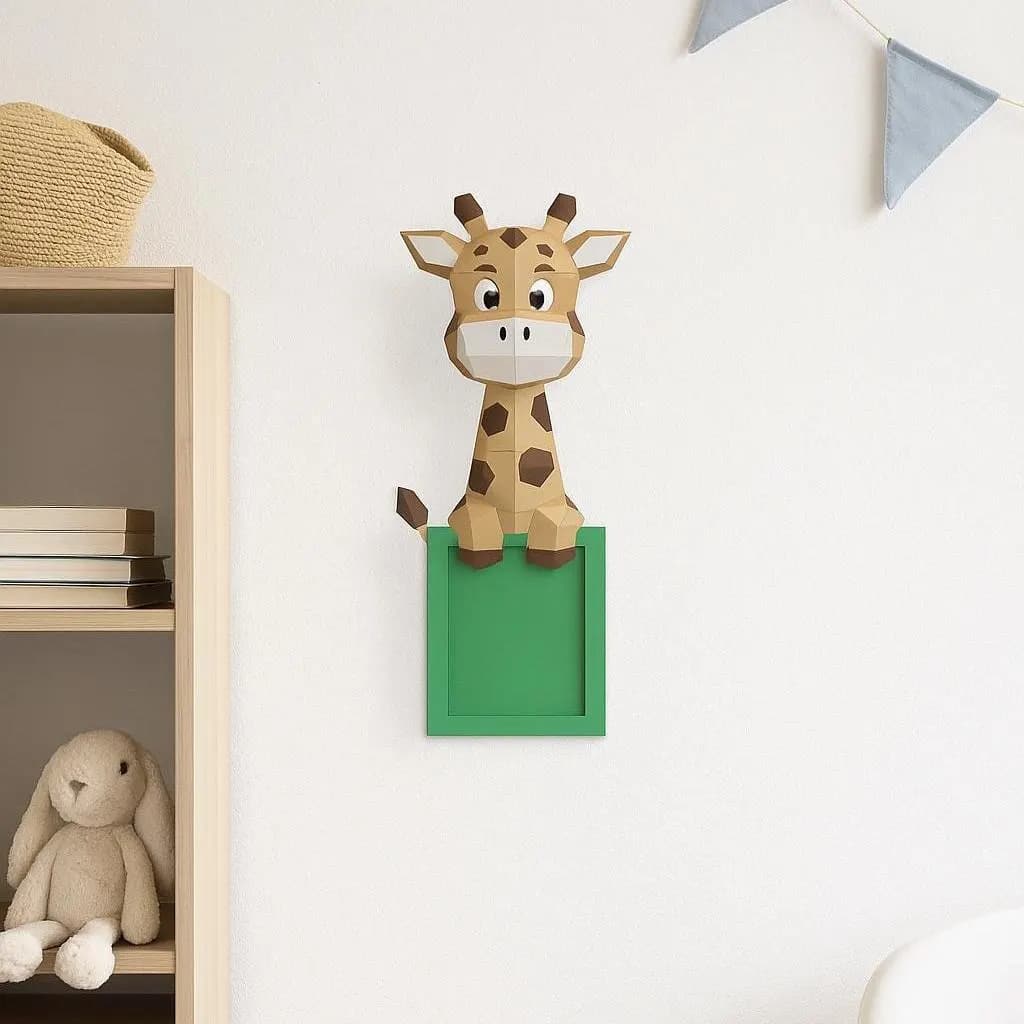
Behind the name is a creative trend that’s easy for anyone to enjoy: you build a paper object yourself using thick paper pieces that are cut and folded into shape—like guided origami. Applied to photo frames, papercraft lets you create things like an adorable monkey or lion-shaped frame in full 3D. The kit includes a printable template (or pre-cut sheets) that you assemble with glue. The result is a unique frame with space at the back to slide in a photo, which you can either stand up or hang on the wall. The wow effect is real: it looks like a small geometric sculpture—except it’s made from paper. And no worries, these designs are beginner-friendly: you don’t need to be a craft expert. Most kits come with clear, numbered instructions that make the process easy to follow.
A fun DIY activity to enjoy together as a family
The other big advantage of a papercraft frame is the creative experience it offers. Instead of buying a finished product, why not get your children involved in making it? Building a 3D paper photo frame can become the perfect Wednesday afternoon or weekend activity. Younger kids can help in their own way: adding glue to tabs, choosing colours, pressing pieces into place… “My kids were so excited to make their own decor,” says one delighted mum, “and now they proudly show everyone the frame they made themselves.” This kind of DIY helps develop fine motor skills, patience, and creativity. Most of all, it creates a special bonding moment away from screens (creative kits for children are hugely popular with parents looking for educational activities). In the end, you don’t just get a one-of-a-kind frame—you also create memories while making it. A double keepsake, in other words!
Tips for making your DIY frame a success
If you’re tempted to give it a try, here are a few practical tips from our experience:
- Set up your space – Work on a large protected table (a paper tablecloth works great) with everything within reach: scissors or a craft knife, glue, a ruler, and possibly a blunt knife or folding tool to score the folds.
- Follow the steps – Papercraft kits usually number each piece and give you a clear assembly order. Take the time to fold carefully along the lines before gluing—the final build will be much easier.
- Be patient and keep it fun – Show your child that taking care can still be enjoyable. If a piece is slightly off, no problem—you can adjust it. The goal is to have a good time, not to be perfect.
- Make it your own – That’s the beauty of DIY: you can customise it! Why not let your little artist colour or paint the frame once it’s assembled? Or add stickers, glitter (if they love it), or decorative touches to the paper before building. The result will be truly unique.
In the end, assembling a 3D paper photo frame usually takes a few hours (allow around 2 to 3 hours for a detailed model like a lion or elephant). So it’s a great activity to spread over several sessions if your child is still young and you want to avoid frustration. And the reward—seeing the finished creation with their favourite photo inside—is more than worth the effort… and the laughter over glue-covered fingers.
Inspired by what they love: frame themes that spark wonder
Every child has their own obsessions and favourites. The good news? There are photo frames for just about every childhood passion. Here are a few winning theme ideas:
- Funny animals – A timeless favourite with little ones. Picture a photo frame surrounded by a cheeky monkey pulling a face, or a lion’s head roaring silently around the picture. Babies and toddlers love it: “Our animal friends fascinate, entertain and reassure little children,” confirms a children’s decor expert (Source). Safari, jungle, farm… these frames fit perfectly into an animal-themed bedroom, which is always on trend.
- Cartoon and storybook heroes – For older children (3–6 years), you’ll find frames featuring beloved characters (Disney princesses, superheroes, The Little Prince, and more). Some brands offer small decorated plastic frames (Frozen, Cars, etc.). Or why not personalise a plain frame yourself by adding images of their favourite hero? Instant success.
- Educational themes – Yes, decor can be educational too. Think of a poster-style frame with a world map or illustrated alphabet—ideal for preschoolers learning through play. Or a blackboard-style frame where you can write a quote or the date of the day in chalk.
- Magical and adventure worlds – Unicorns and castles for enchanted dreams, rockets and planets for little astronauts… the possibilities are endless. If your child is crazy about dinosaurs, hang a dinosaur-shaped frame next to their photo (yes, that exists in 3D papercraft too—a smiling T-Rex holding the picture between its paws).
The idea is to turn the photo frame into a standout decor feature that reflects your child’s personality. Feel free to match the frame with other decor elements: for example, a jungle monkey frame works beautifully in a tropical-themed room with monkey soft toys, a leafy green wall border, and similar accents. That’s how you create a visual story in the room—and children love growing up in a coherent little world that fuels their imagination.
Where and how should you place frames in the bedroom?
Having lovely frames is great. Putting them in the right place is even better. Here are a few layout tips:
- Above the bed or changing table – These are spots where baby spends a lot of time, so you might as well give them something lovely to look at. A triptych of small frames above the cot, lined up or arranged like a cloud, draws the eye and personalises the sleep area. Just make sure everything is mounted securely and remains out of reach as your child grows.
- The memory wall – For an older child, you can dedicate an entire section of wall to an evolving photo collage. Mix family photos, friends, holidays, and even framed drawings they made themselves. The effect is like a mini children’s art gallery. Tip: first map out the arrangement on the floor or on kraft paper taped to the wall so you can balance the layout before hammering in any nails.
- On a shelf or chest of drawers – Not every frame has to be hung. A beautiful standing frame looks great on a low shelf, where your child can pick it up and look at it (as long as it’s not fragile). On a changing unit, a frame with a photo of siblings can make baby smile during dressing time. A small amount of removable adhesive putty can help keep the frame safely in place.
- On the door or handle – Here’s an original idea: tiny lightweight frames can be hung on the bedroom door (for example with their initial, or a picture of their favourite character). You can even find foam or fabric versions, which make the entrance to their little world feel extra personal.
Don’t be afraid to play with height. What works as decor for parents can also become interactive for children: for example, hanging one unbreakable frame at their level allows them to go closer, look at the picture, and comment on it. For a set of multiple frames, it’s best to keep the spacing consistent for a harmonious result—visually, aim for around 5 to 10 cm between each frame in a grouped arrangement.
Giving a photo frame as a gift: a heartfelt and original idea
Whether it’s for a birth, christening, or birthday, photo frames are always a much-loved gift for parents… and later for the child too. It’s a present that feels both personal and lasting. For example, “My First Birthday” or “Baby Handprint and Footprint” frames are especially popular because they help preserve a precious keepsake from baby’s first months.


If you’re looking for a more creative gift, think about DIY photo frame kits. Giving a 3D papercraft kit, for example, means giving an experience as well as an object. Parents can build the frame while baby naps—or later with their child once they’re old enough—and then keep it as part of the room decor. It’s original and memorable: not many people think of it, so you’re sure to make an impression when the gifts are opened. And let’s not forget that grandparents absolutely love photo frames too: give them a beautiful frame with their grandchild’s little face in it, and you’re guaranteed smiles. They can proudly display it at home or even take it with them on trips. A photo frame is the perfect cross-generational gift.
All in all, whether classic or handmade, a children’s photo frame is a reliable family gift idea. Slip in a lovely photo before giving it, and you’ll have an affordable, emotional present that won’t end up forgotten in a drawer. Quite the opposite: it will brighten the home and keep tender memories alive for years to come.
Conclusion: decor that grows with your child
From the first days of babyhood to preschool adventures, the photo frame follows your child’s story and helps tell it over time. As a decor element, it brings colour and life to the bedroom; as a keepsake, it preserves a precious moment; as a DIY activity, it sparks creativity and pride. By choosing a frame that truly fits—playful, safe, and full of personality—you’re sure to make the right choice and make their little cocoon even more special. And if you make it together, it becomes more than decor: it becomes a tangible memory of a beautiful parent-child moment. So, ready to turn simple photos into real decorative treasures? Go for it—hang, glue, create… and watch your little one’s eyes light up as they discover a room filled with love and beautiful frames.
—
Enjoyed this article? Feel free to explore our other children’s decor ideas, and discover all our 3D papercraft photo frame designs in our shop. Your turn to create a children’s bedroom that’s beautiful, safe, and full of memories!